
항상 프로젝트를 시작하면 하는 셋팅이지만, 약간씩 설정이 헷갈리고 대부분 VScode를 기준으로 적어놓은 글이 많기에 정리하고자 한다.
이글은 Webstorm에서 TypeScript를 기준으로 ESLint 와 Prettier를 설정하는 방법이다.
1. eslint + prettier 설치(typescript 기준)
우선 eslint와 prettier를 설치해주자. 아래 명령어를 프로젝트 터미널에 입력해주면 된다. 이는 TypeScript 기준이다.
npm install --save-dev eslint prettier typescript
2. eslint에서 typescrtipt를 사용하기 위한 플러그인 설치
eslint에서 typescrtipt 사용을 위한 플러그인을 설치해주자.
npm install --save-dev @typescript-eslint/eslint-plugin @typescript-eslint/parser3. eslint init(설정하기)
아래 명령어를 입력해 eslint 기본 설정을 해준다.
npx eslint --init입력을 하게 되면 아래와 같은 화면이 뜰 것이다.


위와 같이 설정해주자.
설정을 완료하고나면 .eslintrc 파일이 생성 되었을 것이다.
4. eslint와 prettier 충돌 방지
.eslintrc 파일을 설정해주기 전에, prettier와 충돌을 막기 위해 아래 명령어를 입력해준다.
npm install --save-dev eslint-config-prettier eslint-plugin-prettier- eslint-config-prettier : eslint에서 prettier와 겹치는 포매팅룰을 삭제한다.
- eslint-plugin-prettier : eslint에 prettier의 포매팅 기능을 추가한다. eslint-config-pretteir로 eslint의 원래 포매팅 기능을 없애버리고 eslint-plugin-prettier로 prettier의 포매팅 기능을 사용한다.
5. 추가적으로 eslint에 필요한 플러그인 설치
- 에어비앤비 스타일 적용하기
리액트 관련 규칙을 포함하지 않고 싶다면 위의 명령어를, 포함하고 싶다면 아래 명령어를 입력하면 된다.
npm install --save-dev eslint-config-airbnb-base # 리액트 관련 규칙 X

npm install --save-dev eslint-config-airbnb # 리액트 관련 규칙 O- React 사용을 위한 플러그인
npm install --save-dev eslint-plugin-react eslint-plugin-react-hooks eslint-plugin-jsx-a11y eslint-plugin-import- eslint-plugin-react : React 규칙이 들어있는 플러그인
- eslint-plugin-react-hooks : React Hooks 규칙이 들어있는 플러그인
- eslint-plugin-jsx-a11y : JSX 요소의 접근성 규칙에 대한 정적 검사 플러그인
6. .eslintrc 파일 설정
이제 생성된 .eslintrc 파일을 본인의 스타일에 맞게 설정해주면 된다.
나는 아래 코드와 같이 설정 하였다.
module.exports = {
  root: true,

  env: {
    es6: true,
    node: true,
    browser: true,
  },

  parser: '@typescript-eslint/parser',

  parserOptions: {
    ecmaFeatures: { jsx: true },
    jsx: true,
    useJSXTextNode: true,
  },

  extends: [
    'eslint:recommended',
    'plugin:@typescript-eslint/recommended',
    'eslint-config-prettier',
    'plugin:react/recommended',
  ],
  plugins: [
    '@typescript-eslint',
    'import',
    'prettier',
    'react',
    'react-hooks',
    'import',
  ],
  settings: { react: { version: 'detect' } },

  rules: {
    'prettier/prettier': 'error',
    'no-implicit-coercion': 'error',

    'no-undef': 'off',

    '@typescript-eslint/indent': 'off',

    '@typescript-eslint/no-non-null-assertion': 'off',
    '@typescript-eslint/no-explicit-any': 'off',

    'no-extra-boolean-cast': 'off',

    'getter-return': 'warn',

    '@typescript-eslint/explicit-function-return-type': 'off',

    '@typescript-eslint/no-use-before-define': 'off',

    '@typescript-eslint/no-empty-interface': 'off',

    '@typescript-eslint/no-parameter-properties': 'off',

    'no-restricted-imports': [
      'error',
      {
        paths: [
          {
            name: 'util',
            importNames: ['isArray'],
            message: '`Array.isArray`를 대신 사용해주세요!',
          },
        ],
      },
    ],

    'no-async-promise-executor': 'warn',
    '@typescript-eslint/prefer-as-const': 'warn',
    '@typescript-eslint/no-non-null-asserted-optional-chain': 'warn',
    '@typescript-eslint/ban-types': 'warn',
    '@typescript-eslint/no-inferrable-types': 'warn',
    '@typescript-eslint/no-empty-function': 'off',
    '@typescript-eslint/naming-convention': [
      'error',
      {
        format: ['camelCase', 'UPPER_CASE', 'PascalCase'],
        selector: 'variable',
        leadingUnderscore: 'allow',
      },
      { format: ['camelCase', 'PascalCase'], selector: 'function' },
      { format: ['PascalCase'], selector: 'interface' },
      { format: ['PascalCase'], selector: 'typeAlias' },
    ],
    '@typescript-eslint/explicit-module-boundary-types': 'off',
    '@typescript-eslint/array-type': ['error', { default: 'array-simple' }],
    '@typescript-eslint/no-unused-vars': ['warn', { ignoreRestSiblings: true }],
    '@typescript-eslint/member-ordering': [
      'error',
      {
        default: [
          'public-static-field',
          'private-static-field',
          'public-instance-field',
          'private-instance-field',
          'public-constructor',
          'private-constructor',
          'public-instance-method',
          'private-instance-method',
        ],
      },
    ],
    'prefer-const': 'error',
    'no-var': 'error',
    curly: ['error', 'all'],
    eqeqeq: ['error', 'always', { null: 'ignore' }],
    'import/no-duplicates': 'error',

    'react/prop-types': 'off',

    'react/display-name': 'off',
    'react-hooks/rules-of-hooks': 'error',
    'react-hooks/exhaustive-deps': 'error',

    'react/jsx-no-target-blank': 'error',

    '@typescript-eslint/no-var-requires': 'warn',
    'react/react-in-jsx-scope': 'off',
    'sort-imports': [
      'error',
      {
        ignoreCase: true,
        ignoreDeclarationSort: true,
        ignoreMemberSort: false,
        allowSeparatedGroups: true,
      },
    ],
    'import/order': [
      'error',
      {
        'newlines-between': 'always',
        groups: [
          ['builtin', 'external'],
          'internal',
          'parent',
          'sibling',
          'index',
        ],
        pathGroups: [
          { pattern: 'react', group: 'external', position: 'before' },
          {
            pattern: '@/**',
            group: 'internal',
          },
          {
            pattern: 'src/**',
            group: 'internal',
          },
        ],
        pathGroupsExcludedImportTypes: ['src/**', '@/**'],
        alphabetize: {
          order: 'asc',
          caseInsensitive: true,
        },
      },
    ],
  },
};
7. 웹스톰 환경에서 eslint 적용하기
이제 기본 설정을 해주었으면, 웹스톰 환경에도 적용해주자.
- Preferences > Languages & Frameworks > JavaScript > Conde Quality Tools > ESLint
좌측 상단에 존재하는 Preferences를 누르고 위의 순서대로 클릭해 ESLint 설정으로 가주자. 귀찮다면 검색란에 ESLint를 입력해도
된다. 그럼 아래와 같은 창을 보게 될텐데, 사진과 같이 설정해주면 된다.

- 자동 저장시 리포맷
- 나는 자동 저장시 ESLint 스타일에 맞게 코드를 변경하고 싶기 때문에 아래와 같이 자동 리포맷도 설정해주었다.

리포맷 실행전과 후를 비교해보자.
- 실행전

- 실행후

예쁘게 리포맷 된 것을 확인할 수 있다.
이렇게 ESLint를 설정해 보았다.
마저 Prettier도 설정해보자!
Prettier
1. 웹스톰 플러그인 설치
Preferences > Plugins 선택 후 Prettier를 검색하여 설치한다.
2. .prettierrc 파일 생성
.eslintrc 가 있는 곳에 .prettierrc파일을 생성해준다. 파일 내용은 본인이 원하는 대로 해주면 되는데 나는 아래와 같이 설정하였다.
- .prettierrc
{
  "printWidth": 80,
  "singleQuote": true,
  "trailingComma": "all",
  "tabWidth": 2,
  "useTabs": false,
  "semi": true,
  "endOfLine": "lf"
}
prettier 파일 설정에 관해 자세한 내용을 알고싶다면 아래 사이트를 참고하자.
Prettier · Opinionated Code Formatter
Opinionated Code Formatter
prettier.io
3. 웹스톰에서 prettier 적용하기
- Preferences > Languages & Frameworks > JavaScript > Prettier

Prettier의 설정을 위와 같이 해준다.
4. 저장 시 prettier 적용
ESLint와 마찬가지로, 저장 시 자동으로 prettier가 적용되도록 설정 해주었다.
- Preferences > Plugins 선택 후 File watchers를 검색하여 설치한다. 기본적으로 이미 설치되어 있을 수도 있다.
이제 tool 에서 file watchars를 선택해준다
- tool>file watchars
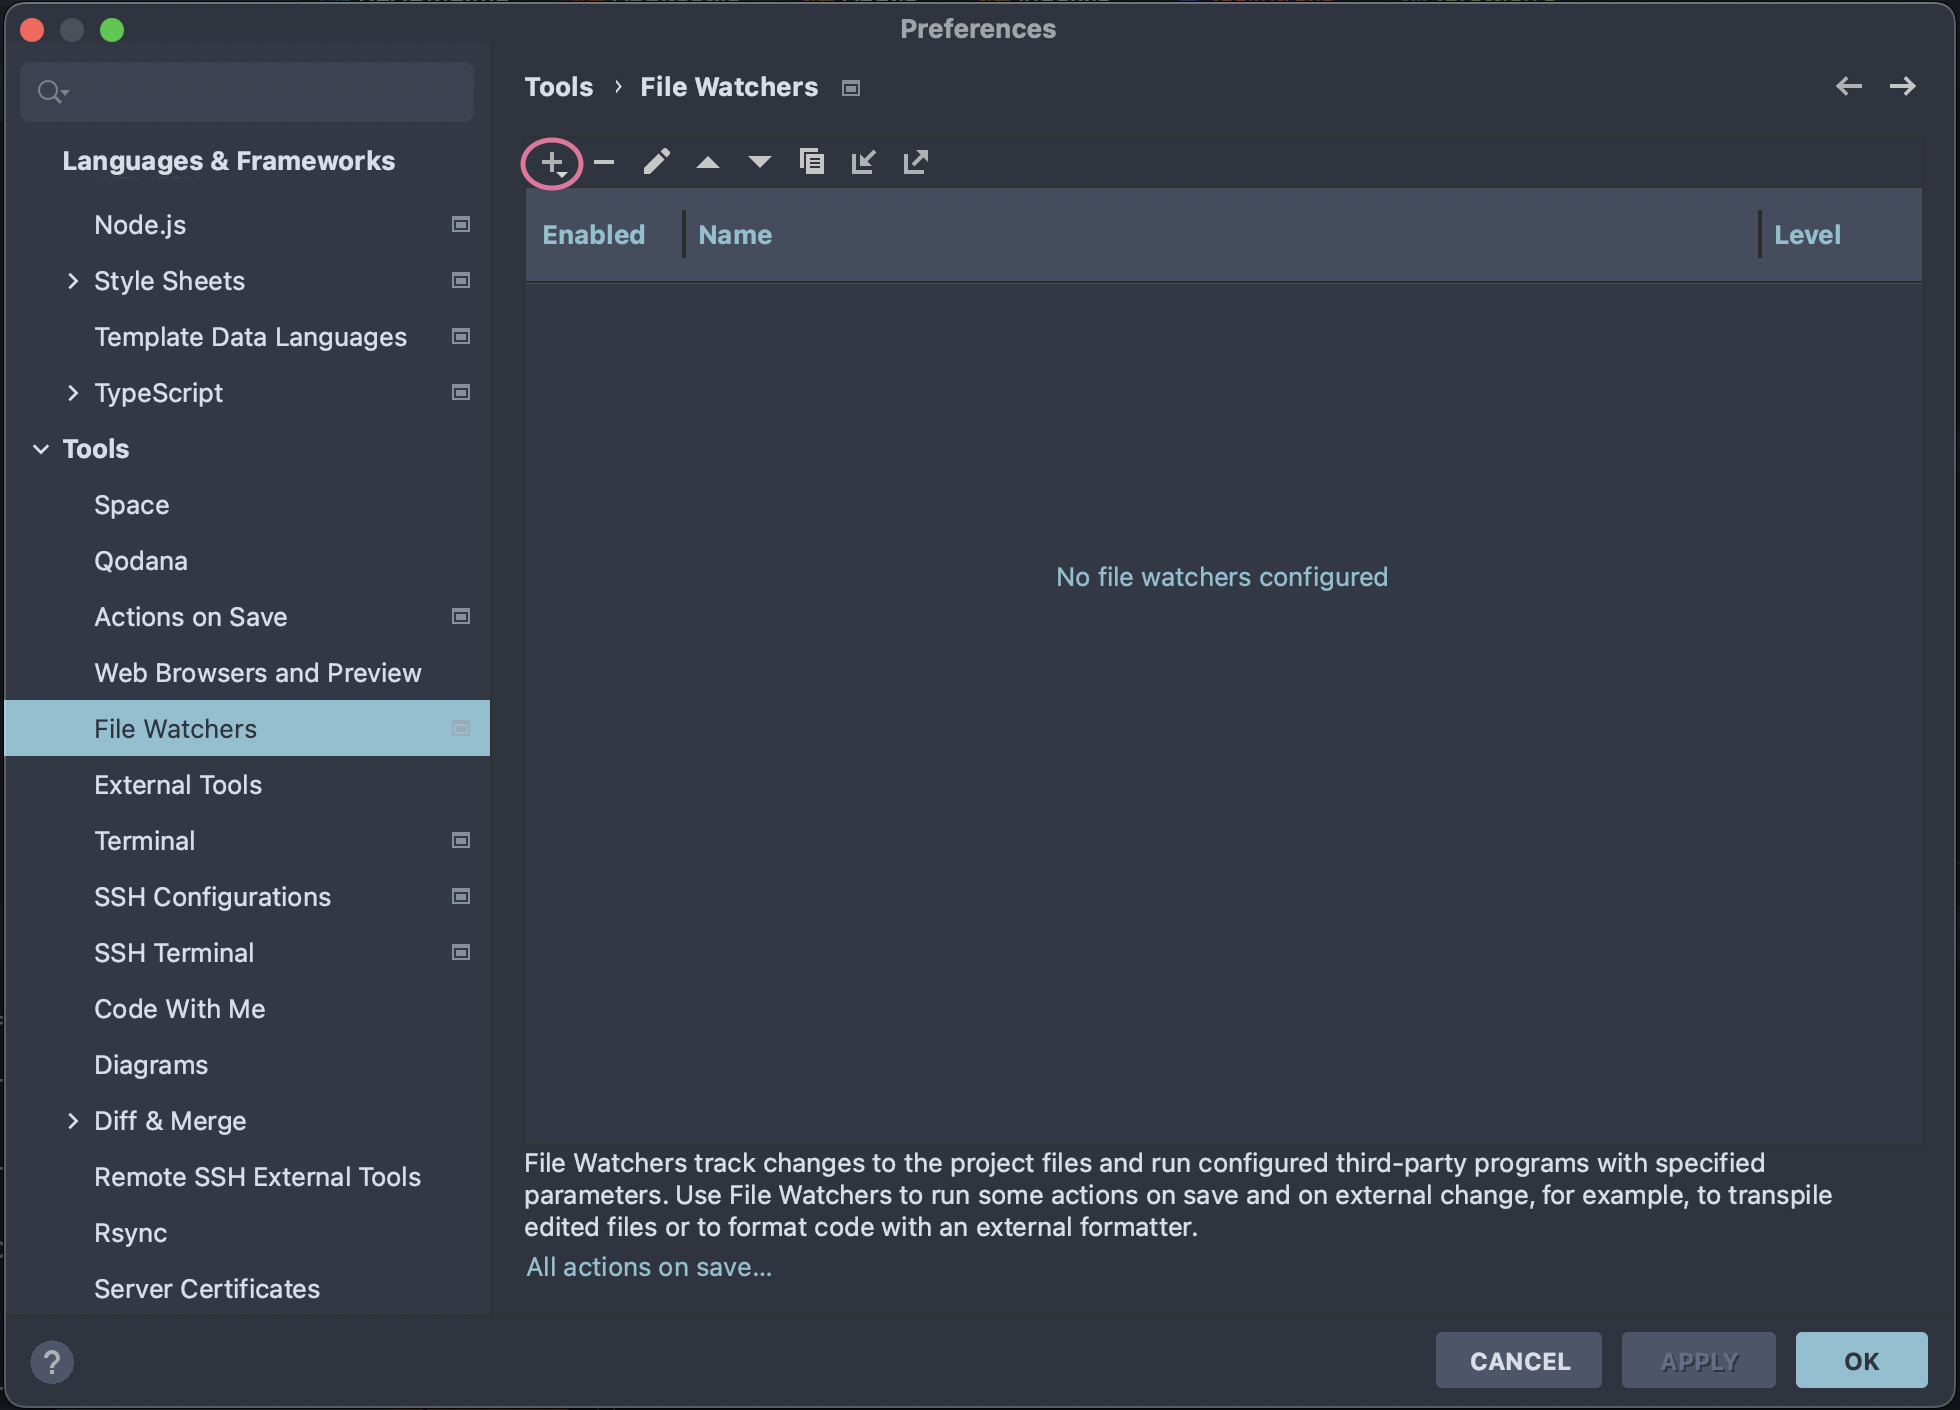
그럼 위와 같은 화면이 보일 텐데, prettier가 적용 될 수 있도록 파일을 만들 것이다.
+ 를 눌러 파일을 만들어주자.
- TypeScript의 파일 타입인 TypeScript JSX , TypeScript , Javascript 각각에 대해서 아래의 설정을 동일하게 적용해주면 된다.

- 프로그램 : $ProjectFileDir$/node_modules/.bin/prettier
- 인수 : write $FilePathRelativeToProjectRoot$
- 새로고침할 출력 경로 : $FilePathRelativeToProjectRoot$
- 작업 디렉터리 : 프로젝트의 루트 디렉토리
사진의 핑크색 부분을 위와 같이 설정해주면 완성이다!
만약 코드 파일에서 prettier/prettier 에러가 나는 경우에는 .eslintrc 파일의 rules 부분을 변경해주자.
- 아래와 같이 해주면 된다.
"prettier/prettier": "off"
이 글을 통해 웹스톰 사용자들이 ESLint와 Prettier를 손쉽게 설치 하길 바란다.